How to use an AR Marker in Valkyrie (augmented reality image anchoring)
An augmented reality experience needs to locate where to place the content in the real world, hence the software needs an "anchor".
Valkyrie proposes 2 types of anchors for you to place your AR scene in the real world:
- Standard horizontal plane anchor
- Image anchor If you are interested in vertical plane anchor or face anchor, please contact us for a quick chat as we have not included it in the main software version.
For the image anchor, we advise users to use a physical marker like a QR code. This allows you to control exactly how your users will experience your scene. You could print a marker on business cards, pamphlets, magazines... and have your scene anchor on it. We propose to show you how in this tutorial.
Horizontal plane anchor for augmented reality with Valkyrie
First of all, let's see and example of scanning an horizontal plane in your environment. This is the basic anchor type for most augmented reality scenes:
Now that we are clear on that, let's see image anchoring.

Standard Valkyrie QR code anchor for augmented reality scenes
Now, if you want your scene to be displayed at a specific location without scanning your environment for eons, you should know that all VPK files created with Valkyrie and played on our mobile platform We3D will natively anchor on the standard Valkyrie QR code below:

Print that QR code or display it on a screen, and your augmented reality scene will anchor on it right away as shown in this video:

Set up your own image anchor for augmented reality scenes in Valkyrie
Finally let's now see how to include your own AR marker in your project so that your scene can anchor on it.
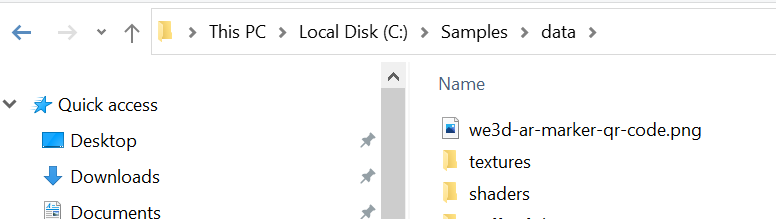
For the sake of the example, we will show you how to add the we3d-ar-marker-qr-code.png image shown to you in the previous section to a VLK project. Of course, when you do it, just use your own image file.
First, copy your marker image in your VLK project directory:
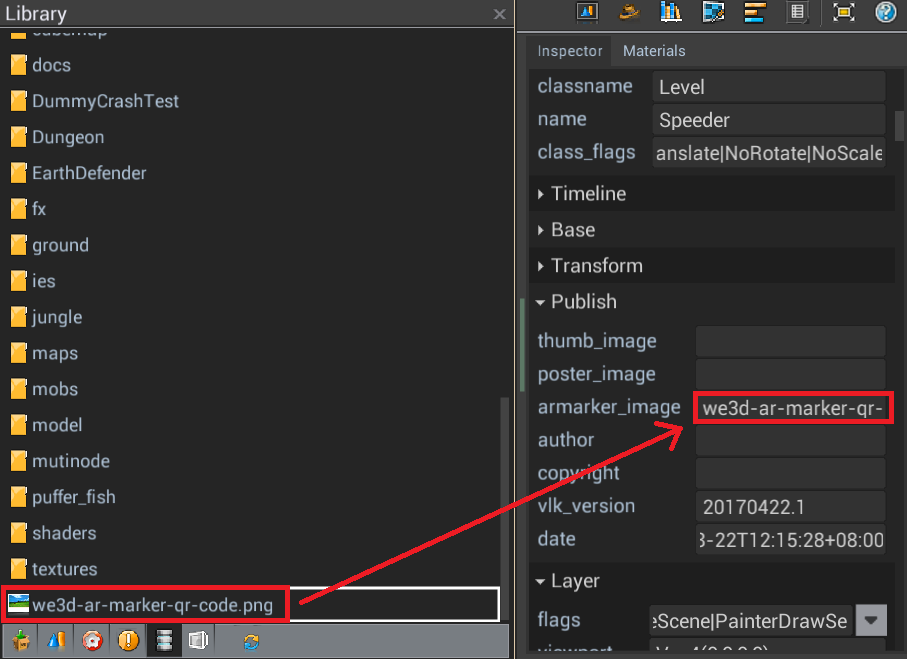
Then inside your project, select the level and go to the Publish section to find the field armarker_image:

Finally, just drag & drop the AR marker onto the field:
That is all you need to know.
Now if you export your project on mobile, your scene will anchor on this AR marker you just added.
How to create your own AR marker for augmented reality
You can use any design tool to create your image. The idea however is that your image contains enough contrasted elements to make it easy for mobile devices to scan it, which is why we chose a rich black & white QR code for ours.
If you play with this feature, you will also notice that your AR scene will scale according to the size of your AR marker. Just take note that the smaller the marker, the harder it will be for your device to scan, and your scene might not be as stable as with a bigger marker.
After these final remarks, do your own tests and enjoy!