Getting Started 02: Introduction to Events & Action
Creating interactions without coding is the key strength of Valkyrie Engine.
What are interactions?
Interactions are a set of events and actions that give life to apps & games. Actions & Events are a built-in Valkyrie Engine feature that allow content creators to make their assets respond to events when triggered. For example, focus the camera on the subject when the user presses on it | Open a door when the user taps on it | Make a character run when pressing on a key, etc.
Setting Up
- Create a AnimMixer from the template accessible in the Library. Any template is Alright to start with.
- This template is an example of simple animation blending using events and actions.
.gif)
- Now, delete the Entities that we do not need by selecting the entity then clicking on the delete button in the icons list above. Delete entities StatesMachine(Dummy) and dctskin_idle(character). Keep CamPivot(Dummy), Ground(Primitive), and Light(Light).
.gif)
-
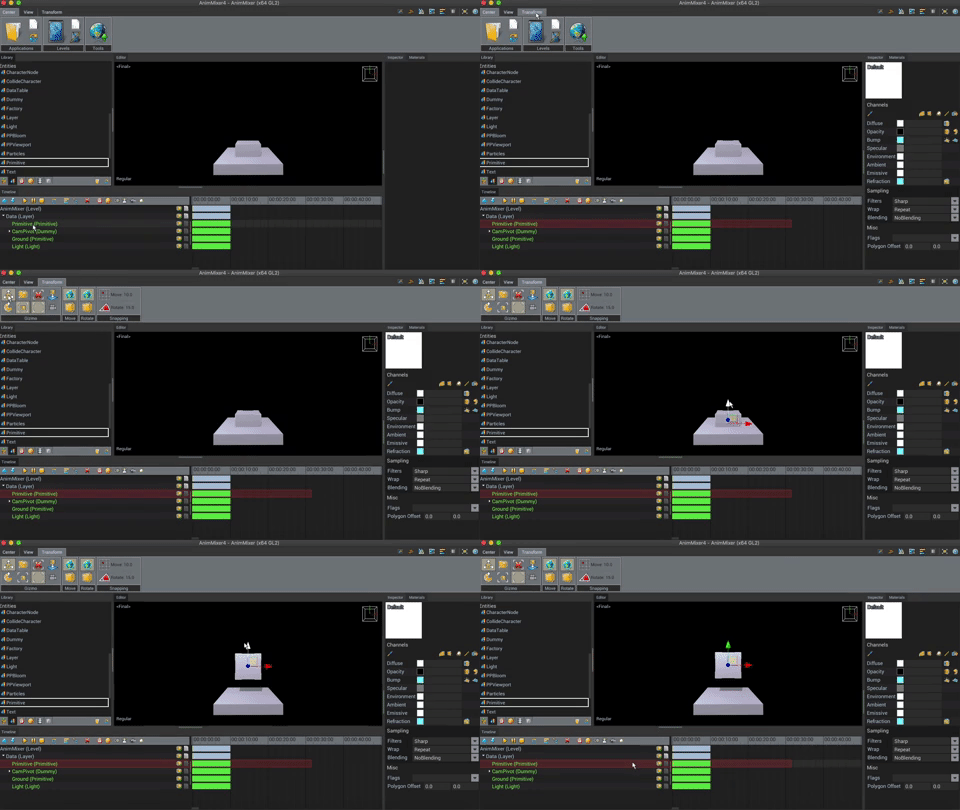
Go to the entities icon and drag and drop a Primitive in to the timeline.
.gif)
-
Adjust the Primitive with the transform tool located in the top right hand corner so that it is fully in view

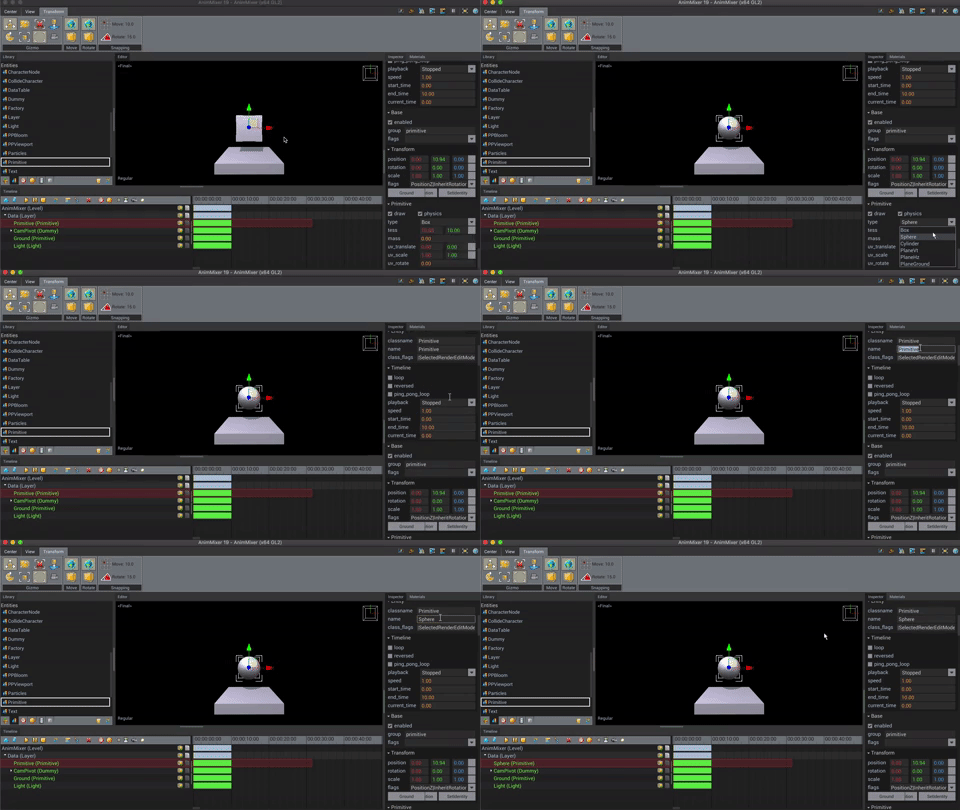
- In inspector on the right of your screen, under Primitive you are able to select Type and change the shape of the Primitive. For this example we will make it a sphere.

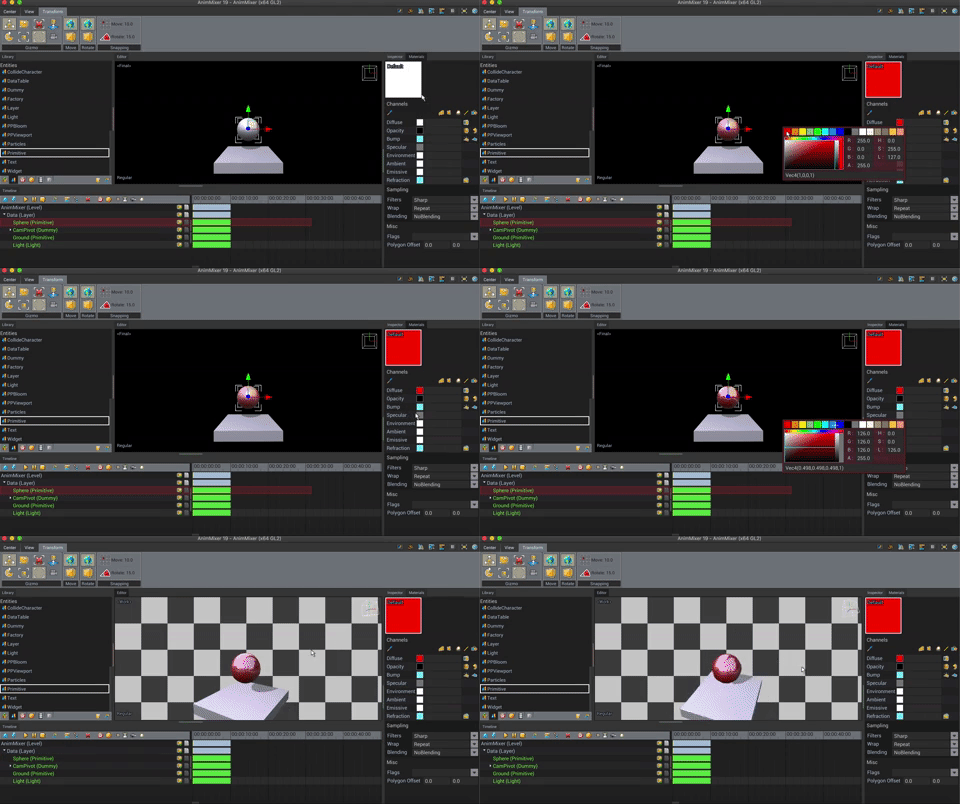
- Change to materials on the right of your screen, click on Diffuse and change it to the colour of your choice. Click on Specular and turn it all the way up, Specular controls the reflection and sheen of the primitive.

Where can I find actions & events?
-
Actions are located at the bottom-left corner of the UI, next to the entities tab.

-
By clicking on the Actions tab, you will discover all possible Actions. When pressing CTRL while hovering on an Action, its description will be displayed.
-
Events are located at the bottom-left corner of the UI, next to the actions tab.

-
By clicking on the Events tab, you will discover all possible Events. When pressing CTRL while hovering on an Event, its description will be displayed.
How to create an interaction?
In the below example, we are going to show you how to make a scene in which, when a cube button is pressed, a sphere travels back and forth between two points while changing color. Check the Downloads section later in this tutorial if you want to get the example file.
Prepare the assets
-
In this exercise, we will transform this static sphere into an interactive object.
-
Create a new Primitive that we will use as a trigger for the Event.
-
Go to the Entities tab and Drag & Drop a Primitive in the timeline.

-
By default, primitives are Box-shaped, however you may change the source geometry shape at all times.

-
You will notice that the Physics flag is checked. This means that this primitive’s collision box can be interacted with. Disabling the Physics flag will render the entity untouchable.
-
Now we want the sphere to move to a specific location when the box is pressed by the user and then return to its original position.
-
To do so, we need to create a Dummy entity to specify the destination of the sphere when the box is pressed.
-
In the entities tab, select Dummy and Drag & Drop it in the timeline.

-
Position it at your convenience using the translation mode by pressing CTRL + Q, or by changing directly the position values in the inspector.
-
Now we need to create another Dummy entity to specify the sphere’s original position.
-
Once again, Drag & Drop a Dummy in the timeline and position it at the center of the sphere or at the original position of your choice. You can rename your entities for a better readability.

Physics configuration
- Before designing our interactions, we need to check the collision settings.
- Select the layer containing the assets, in this case it is called Data.
- Scroll down to the Physics section. You will find the Physics Response Table (resp_table).
- This field defines the asset types that can be collided with. The setting we are looking for is called ray=.
- When a user interacts with the scene, a ray is sent into the scene and when it hits an asset it can collide with, various actions can be triggered.
- In this case, we are using a Box primitive, so we need to make sure that primitives can be collided with.
- Type primitive in the Ray= field. If several items are present, separate them with a comma. Be careful not to key any spaces.

- Now rays can collide with primitives in your layer.
Let’s design the interaction | Part 1
-
Now that all the assets are ready, we can begin designing the interaction.
-
We will add a Finger Event to the scene. This Event is triggered when a specific finger or mouse button has been pressed or released.

-
By default, the Event will be triggered every time a user either left-clicks in your scene with his mouse pointer or touches his touchscreen on mobile.
-
You can select the Event in the timeline to configure it if you wish to.

-
The Event is now ready but we need to define what happens when it is triggered.
-
Go to the Actions tab and add the InputRayCast Action to the Finger Event.
-
We only want the ray to be sent briefly so let’s set its duration to 0.5 seconds.

-
The InputRayCast Action sends a ray in the scene. If the ray hits an asset it can collide with, further actions and events can be triggered.
-
To summarize, we have created:
- an Event to detect the user’s clicks or finger on the screen.
- an Action to send a ray in the scene when the Event is triggered.
Let’s design the interaction | Part 2
-
Now we need to create an Event to handle the rays generated by the InputRayCast Actionwhen they hit an object they can collide with.
-
Navigate to the Events tab and Drag & Drop the EnterRayHit Event onto the Primitive.

-
The EnterRayHit Event is triggered when the asset it is bound to gets hit by a ray.
-
The Event is ready, the last step is to define what actions will be executed when the Box primitive is hit by a ray.
-
Go to the Actions tab and Drag & Drop the AnimMoveTo Action onto the EnterRayHit Event.

-
The AnimMoveTo Action smoothly moves assets to a target location. It features a spring so the animation is guaranteed to be smooth.
-
Select the AnimMoveTo Action in the timeline and configure the Target & Destination fields.
-
The Target is the asset to be moved (Sphere in this case) & the Destination is the position the asset must be moved to (Dummy in this case). Drag & Drop these two objects in the relevant fields.

-
Let’s test the interaction we have just created. Press ALT + SPACE to switch to the scene’s camera view and press either Play at the top of the timeline or press CTRL + SPACE to play the scene.
-
Now press on the Box primitive. As you can see, the Sphere is moving to the designated Destination.

-
But it is not over yet, we still need to create an Action for the sphere return to its original position.
-
Select the AnimMoveTo Action in the timeline and either copy it by pressing CTRL+C or right click on it and select Copy.
-
Paste it in the same EnterRayHit Event.

-
In the new AnimMoveTo select the dummy to return to the original position (In this case, OriginalPos).

-
The 2 actions are overlapping so we need to specify how long will the sphere take to reach its Destination and return to its original position.
-
Adjust the timeline for both actions at your convenience. In this case, the sphere will take 3 seconds to reach its Destination and will return to its original position in 7 seconds.

-
Press Play again to test the interaction.

-
Congratulations! You now know how to create basic interactions.
Let’s design the interaction | Part 3
-
From there you can add as many new actions as you want to your interaction.
-
For example, you can change the color of the sphere as it travels to its destination or rotate it depending on your needs.
-
Add a MaterialSetColor Action to the EnterRayHit Event and set the start & end colors as well as the target asset.

-
Press Play to see the results.
-
The sphere now changes its color to blue as it gets closer to its Destination.
-
You can duplicate the MaterialSetColor, switch the start / end colors and offset it in the timeline for the Sphere to return to red while it is returning to its original position.

-
Press Play to see the results.
-
The sphere’s color returns to red as it gets closer to its original position.
Downloads
- Download the tutorial project, the Vlk project: Introduction-to-interactions-20181106.zip.
- Download the end result, the Vlk presentation: Introduction-to-interactions-20181106.vpk.
Frequently asked questions
Can I create my own Actions and Events?
- There are over 100 actions & events built in Valkyrie Engine. By combining them in the sequence of your choice, you can create any kind of interactions from those necessary in simple applications to advanced mechanics.